There are two different values of interest:
- the XMPP domain name - this is used to identify your server (and the entities it defines, like user accounts) over XMPP
- the server host name (FQDN) - this is mainly for networking purposes. It’s also over this name that HTTP Bind / BOSH endpoints and the Admin Console are exposed
From what I understand, the values for your setup aught to be:
- XMPP domain name:
mydomain[.]com
- server host name (FQDN):
ec2…aws[.]com
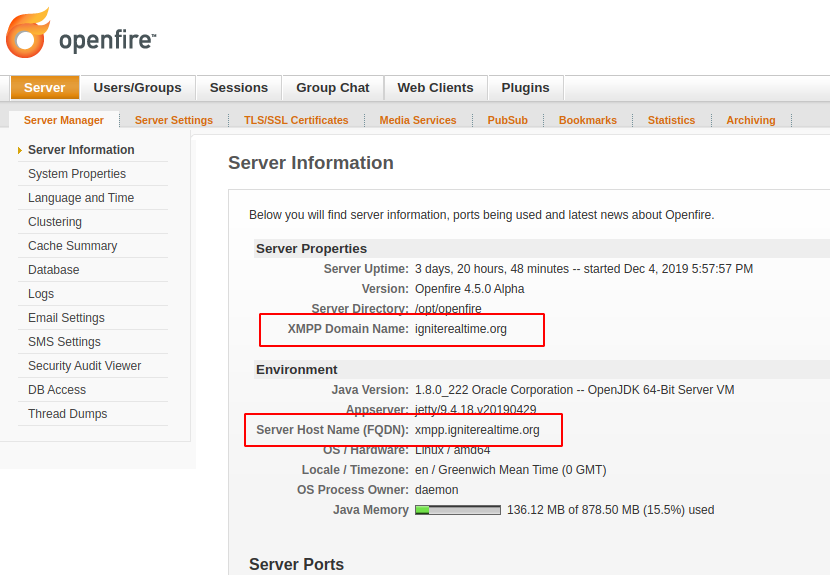
You can see what values are currently in use by logging in to the admin console, and looking at the first page. I’ll share a screenshot of what this looks like on our server.
As you can see, our XMPP domain name is igniterealtime.org and our server host name (FQDN) is xmpp.igniterealtime.org.
Note that it’s not required that the server host name (FQDN) and XMPP domain name share a domain part. It is, however, convenient for TLS (more on that later).
You provide both values when you initially set up Openfire.
The server host name (FQDN) can be changed by editing the configuration file in <OPENFIRE_HOME>/conf/openfire.xml. That file has an XML based structure. You’ll find an element named fqdn in the first level under the jive element. You’ll have to restart Openfire for changes to be applied.
Changing the XMPP domain name is recommended against. After setup, that value will have been used in various places (eg: as part of the identifiers for your users - their JIDs). If the XMPP domain name needs to change, I recommend simply reinstalling Openfire.
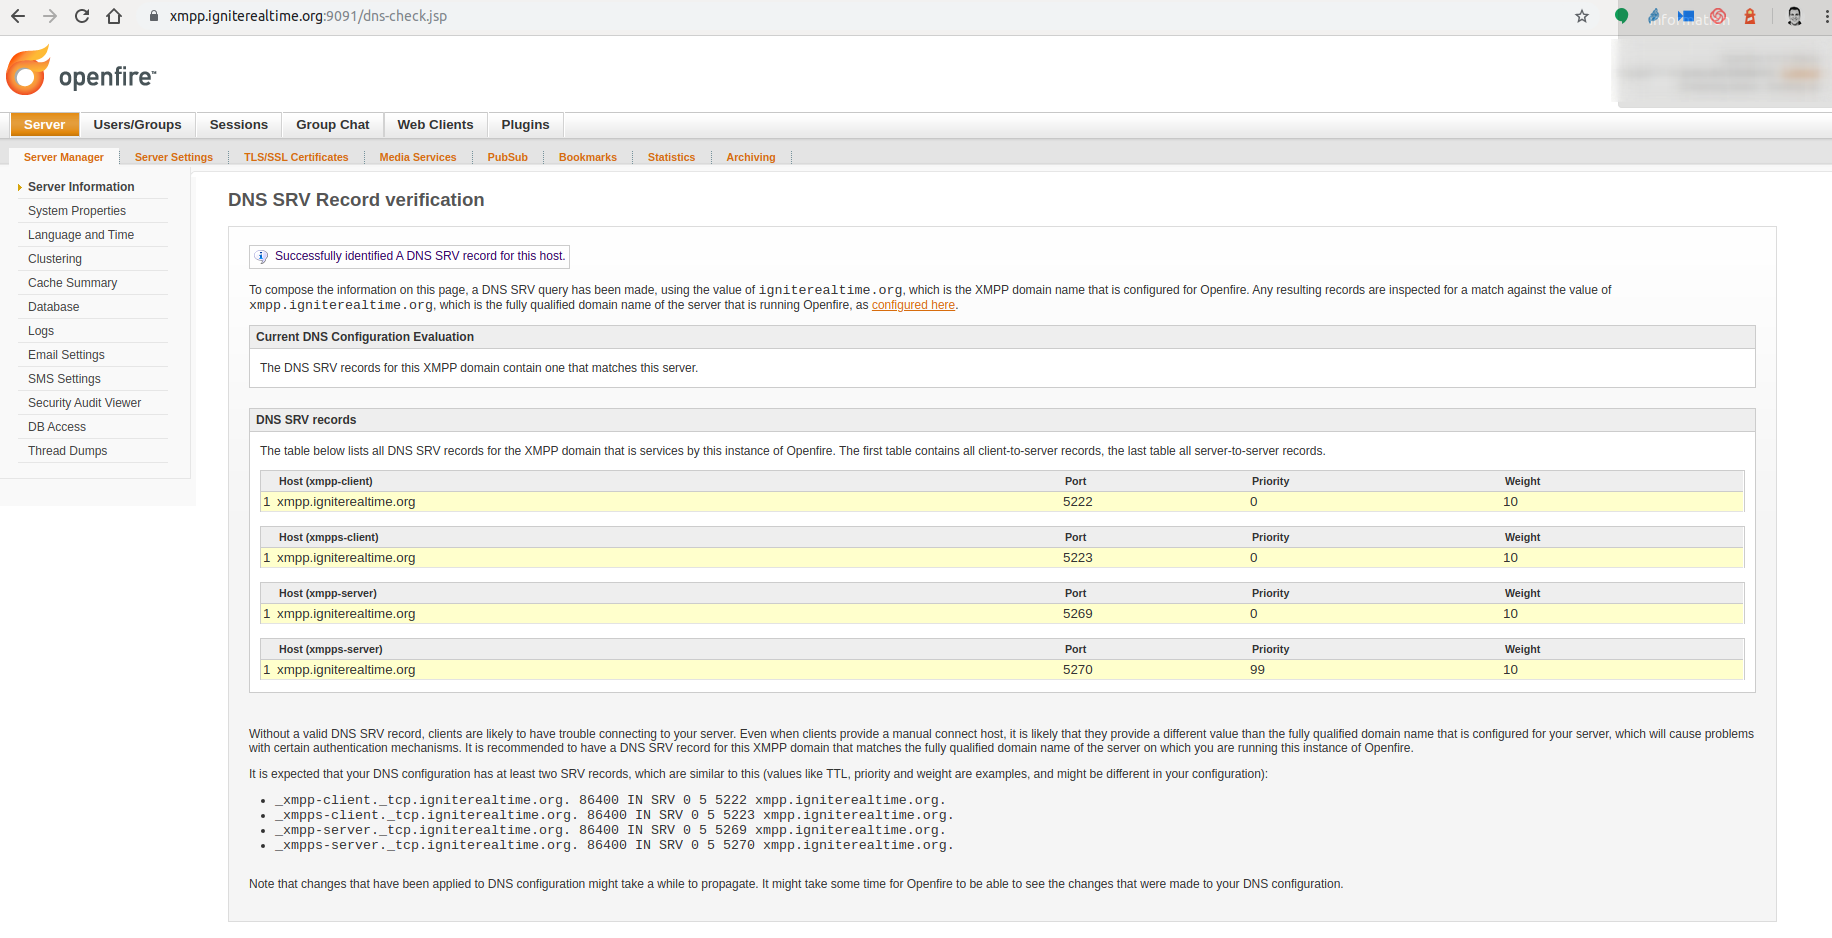
Openfire has a handy page that will show you what DNS SRV records it detected for your server. That page also lists which records you’d best add. Again, a screenshot for our server, which shows how our igniterealtime.org XMPP domain name will, through DNS SRV, resolve to xmpp.igniterealtime.org, the server host name (FQDN).
Openfire will, during setup, generate a self-signed certificate. To manage the certificates that are used by Openfire, navigate to the Server > TLS/SSL Certificates > Certificate Store admin page, and open “Manage Store Contents” of the Identity Store.
If you install your own certificate, make sure to explicitly delete the self-signed certificate that was generated by Openfire! A known issue is that some versions of Java will only use one of the installed certificates, even if there’s a more suitable one available.
A certificate that you install should, at the very least, cover the XMPP domain name (in your example: mydomain[.]com) This value is used by XMPP clients that connect over TCP (port 5222 / 5223), as well as by other XMPP servers when they establish server-to-server connections. However, you’d probably also want the certificate to cover any MUC conference service names (default: conference.<XMPP_DOMAIN>) which will help establish group chat over federation. Other XMPP services might also be good to have (although I’ve rarely seen a real-world issue with them not being covered by the certificate).
The above will take care of the XMPP-side of things, but sadly, there’s more: your server will expose various endpoints on the server host name (FQDN). The most obvious one is the admin console. Another important one is the HTTP-based endpoint used by most webbased clients (that use BOSH / HTTP-Binding). That address is based on your server host name, and not your XMPP domain name. Other endpoints that are exposed like that are services for HTTP File Upload (for file sharing) and various REST APIs that you might use.
As you can see, there’s a good deal of names to be covered by the certificate that you use. By far the easiest setup is one where you make your hostname be an address that is covered by the XMPP domain name value, and have a certificate that covers your XMPP domain name and all of its subdomains via a wildcard.
I hope this helps!